
The first time I used the main stamping image that I used for this mani, I had been dying to do the mani that I did ever since I first saw the plate so I didn't even consider doing anything else with it. Now, as I'm leaning into some old favorite stamping images and trying to use them in a different way, I wanted to be sure that I did something that was top to bottom different with it this time around. Honestly, looking at the two of them I really think that I managed to do that and if I didn't know they used the same image it wouldn't immediately occur to me.
Keep reading for more!

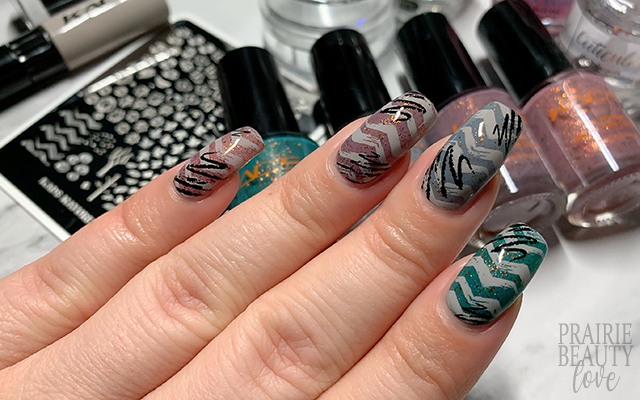
When I grabbed for the KADS stamping plate I used for this mani, I decided to go all in and just use KADS products for every step other than top coat. It was when I was trying to choose a base polish that I actually decided to go hard and just make this baby into a skittle. A while back I ended up picking up all 6 of these muted crelly flakie polishes from KADS and I've been wanting to reach for them more, so this seemed like a perfect time - especially since 5/6 polishes make a really beautiful sort of spectrum across the nails.
These polishes are a little bit sheer, so I did need three coats to all of my nails to get the opacity that I was looking for, but they apply really beautifully so I don't mind that extra coat - and the final look of the polishes is really stunning.
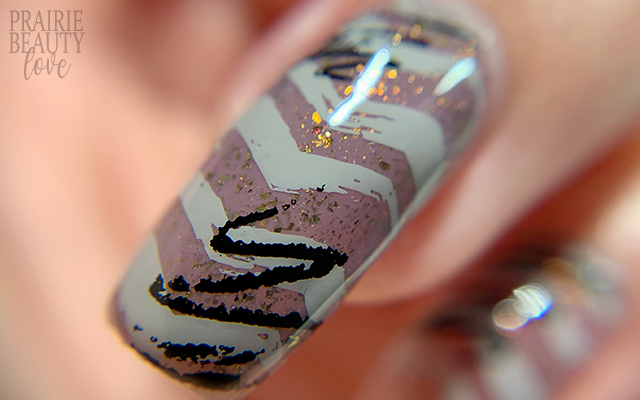
So I knew I wanted to use the grungey chevron image on all of my nails, but I'm a kitchen sink kind of a girl so I knew I couldn't just leave it at that. Ultimately, I ended up taking some inspiration from my last mani and decided to add this sort of scribbed crayon image at two corners of each nail for some interest and added contrast. I started by applying the chevron image to all of my nails using a pale neutral grey stamping polish, alternating the direction of placement to get just a little bit of added interest onto the nail. Next, I picked up the scribble image in black stamping polish and started by applying a corner of it at the tip of my nail and then applied another corner of the image at the base of my nail - it's important to do it in this order if you don't want to have to do a second pick up.
Once I was happy with my stamping, I cleaned up the edges with a brush dipped in acetone and then followed with a nail art top coat to seal in my design. Finally, I finished with a generous layer of quick dry glossy top coat for shine and volume. And voila!
All Products Used
KADS - YM-01 Ash Rose (Pinkie)
KADS - YM-02 Mistletoe Cactus (Thumb, not pictured)
KADS - YM-03 Winter Sky (Middle)
KADS - YM-04 Whispering Winds (Pointer)
KADS - YM-06 Orchid Mist (Ring)
KADS - C17 Inkiness
KADS - 006 Gray
Apipila Smudge Free Top Coat
Cuticula Limitless Quick Dry Top Coat
KADS Nature 056 Stamping Plate
Whats Up Nails Magnified Clear Stamper & Scraper
Pueen Latex Tape Liquid Peel Off Cuticle Guard
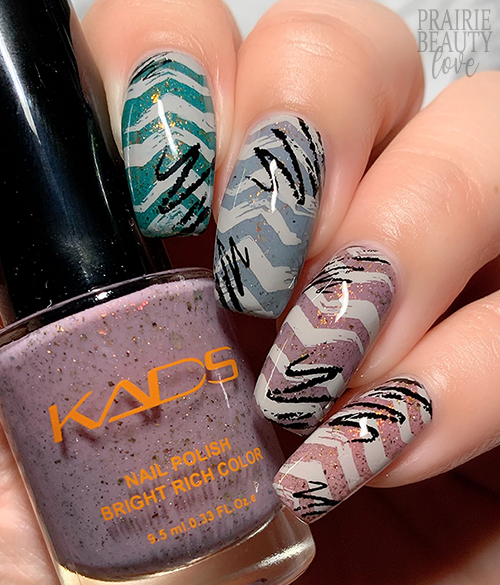
I have to say, immediately after I finished this mani I wasn't entirely sure I was in love with it, which happens to me sometimes, but the more I look at it both in the pictures and on my fingers as I type this I think I'm really happy with how it turned out. I love the way this skittle turned out and I think the stamping really gives a cool, fun vibe.
If you're unfamiliar with KADS, they are a nail art brand that has both some really beautiful nail polishes as well as a huge selection of nail stamping products like stamping polishes and plates. Honestly, I've really been building out my KADS collection over the past year and I suspect that I'll keep building it in coming months. For the most part, I've been really consistently impressed with both the price point and the quality of the products. I've purchased all of my KADS products from their Aliexpress official store, but they also have a website that you can purchase from as well.
Be sure to head over to @pblnails if you want to see a video tutorial for this mani and follow me there to follow all of my nail art designs and tutorials.
Thanks for reading!


0 comments