
NAIL ART: Blue Under The Sea Silhouette Nails

Hey all! Today's mani is actually one I've been planning on doing for ages now but I just hadn't gotten a chance to actually get on my nails. Last year when Whats Up Nails released two different stamping plates featuring various silhouette images that you can use to create layered landscape designs, I was really, really excited because I love those types of designs and I loved that each of the two plates was really curated in a way that makes it super easy to put together a cohesive design across your entire hand while still keeping each nail different. So now, finally, I put together these quite simple under the sea silhouette nails and I'm sort of in love!
Keep reading for more!
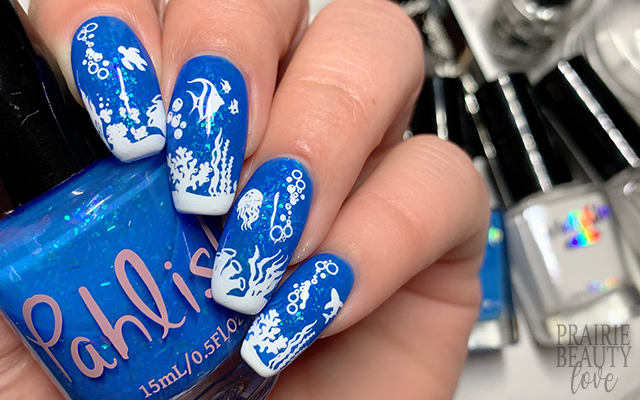
I decided to keep the color story really, really simple for this one because I didn't want it to get too muddy. For my base, I went with a new-to-me polish that was gifted to me by a friend when she was doing some destashing. Pahlish's Adrift is this really gorgeous azure blue shade packed with green and blue/purple aurora flakes and it is, in my opinion, the perfect blue for this type of design because it adds a lot of depth and the colors just scream ocean to me. It's a little bit sheer so I did need three coats for my base, but I think it's worth it for the effect it gives.

For the actual stamping, I started with a sort of wavy water image in a blue stamping polish that is very, very similar to the base polish and ended up being really subtle... and then I entirely forgot my plan to carry that image across my entire hand so it's actually only on my ring finger, which I did first. For the actual bulk of the design, I decided to use a white stamping polish to really maximize the contrast in the design and I started with the sort of ocean floor and plants image. This image is actually a really good size for using across your whole hand because you can choose just small parts of it and create a really nice varied look across the nails. Once I had placed that image at the base, I went in with sea creature and bubbles images on each nail to both fill in that space and also bring more cohesion to the entire design.
Once I was happy with my stamping, I sealed everything in with a nail art top coat before finishing with a generous layer of glossy top coat for shine and to really amp up the overall design. And voila!

All Products Used
Pahlish - Adrift
Whats Up Nails - Cloud Canvas
Whats Up Nails - Blanc My Mind*
Apipila Smudge Free Top Coat
Whats Up Nails Gloss Over Top Coat*
Whats Up Nails A025 Silhouette Menagerie Stamping Plate*
Whats Up Nails Magnified Clear Stamper & Scraper*
Pueen Latex Tape Liquid Peel Off Cuticle Guard*
* = PR Sample

Initially when I finished this mani, I was afraid it would feel too simple overall, but as I sat with it I really fell in love with how it turned out. I really do love this style of design and I find myself super excited to try out some more of the possibilities from the plate I used for this design as well as its partner, so keep an eye out for some more landscape style designs coming in the near future!
Thanks for reading!


0 comments