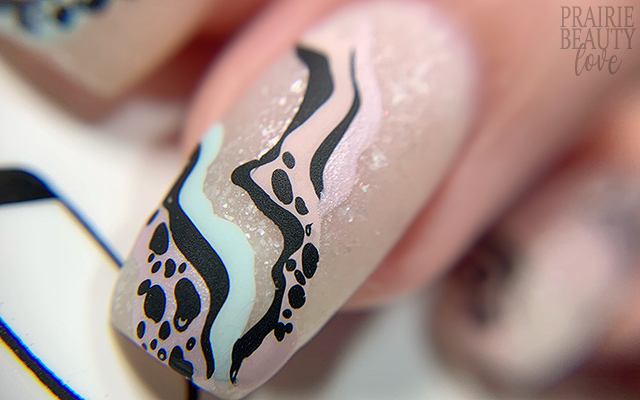
I know I sound like a broken record, but the current trends of abstract nail art are just full of endless opportunities for creativity in countless different styles - and clearly, I want to splash around and play in all of them. For today's mani, I honestly went into it entirely unsure as to whether it was going to work on my nails the way I imagined it in my head. Honestly, a lot of the time it can really go either way - especially when what I'm imagining is inspired by nail art designs done in gel polish, which definitely behaves and performs in a completely different way to traditional polish.
Anyway, without further ado, let's get into the nail art.
I went into this mani knowing that I wanted a really soft, muted color palette on a sheer base, but I didn't really have a plan. It wasn't until I sat down and grabbed a couple of polishes from OPI for my reverse stamping that I decided what I was going to do. My bottle of OPI's Robots Are Forever is getting pretty empty and thick at this point, so I know I need to use it while I can instead of hoarding it and now seemed like the perfect time. I decided to pair it with three more OPI polishes in really soft, muted shades that I would describe as a barely pink pale beige créme, a pastel mint green créme, and a pale silvery pink shimmer. Those three polishes paired with that soft milky base and then really high contrast black stamping polish felt like exactly what I was looking for.
To start, I applied one coat of Robots Are Forever to all of my nails and let it dry while I worked on my reverse stamping.
Essentially the idea that I had with this mani was to mimic similar hand painted designs that I've seen from professional nail techs using gel polish. I wanted to recreate this type of look using regular polish and stamping and I felt like the best way to do that was with some very specific reverse stamping. First, I picked up the image that I wanted to use and then used a fine nail art brush to apply lines of the three very light colored polishes I chose to this mani along the lines of the stamping image. I did my best to drag the brush at the end so that I got a smooth brush stroke at the edge of the image, which allowed me to have a little bit more freedom in how and where I applied the image to the nail. Once the image was dry to the touch on the stamper head, I applied a thin layer of sticky base coat, let it dry down until it was tacky (about a minute or so) and then transferred the image directly from the stamping plate. For my outer nails, I also went in with just straight stamping to fill out the nail a little bit more at the edges.
Once I was happy with the design, I sealed it in with a nail art top coat and then followed with a matte top coat to bring down the shine and give a flat finish. And voila!
All Products Used
OPI - Robots Are Forever
OPI - Movie Buff
OPI - Mexico City Move-mint*
OPI - A Hush Of Blush*
Whats Up Nails - Neither Noir
Orly Bonder Base Coat
Apipila Smudge Free Top Coat
OPI Matte Top Coat
KADS Fashion 091 Stamping Plate
Whats Up Nails Magnified Clear Stamper
NailStuff.ca 11mm Nail Art Brush**
* = PR Gifted
** = PR Gifted/Affiliate NailStuff.ca - use code TRYSH for 10% off first order.
I have to admit that initially I wasn't quite sure that I was in love with this mani, but the more I look at it the more I love how it turned out. Like I said above (and have probably said in a handful of other abstract nail art posts recently) I'm just in love with all of the different abstract design possibilities and I love playing with different techniques to create them, especially the ones that are adapted from gel nail art.
If you're not already following me over at @pblnails on Instagram, be sure to head over there to check out a video tutorial for this design and to keep up with all of my nail art!
Thanks for reading!


0 comments