
#ChristmasNails2022#NailArt12 Nails Of ChristmasBIO SCULPTUREchristmasChristmas Nail ArtJen & Berriesnail artnailsUberchic BeautyWhats Up Nails
CHRISTMAS NAIL ART: Cute Snowy Little Christmas Dudes Nails

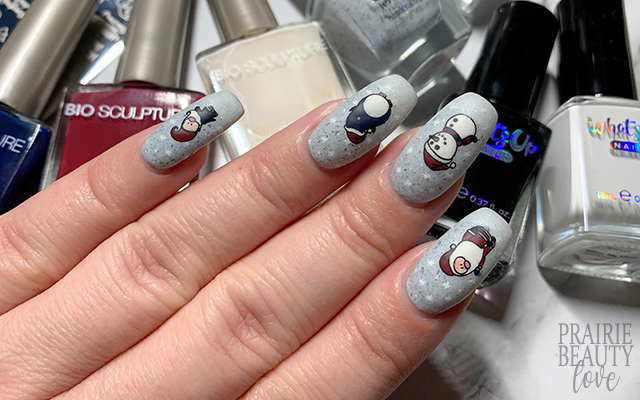
The last couple of years, I've really had fun doing mani's with cute little Christmas-y characters on them, so of course this year I was going to lean into the same thing. I was actually super excited about this particular mani as soon as I had the Uberchic It's Beginning To Look A Lot Like Christmas plate in my hands because this set of characters is just so adorable and works so well together for a really simple but cohesive design - at least I think so!
Keep reading for more!
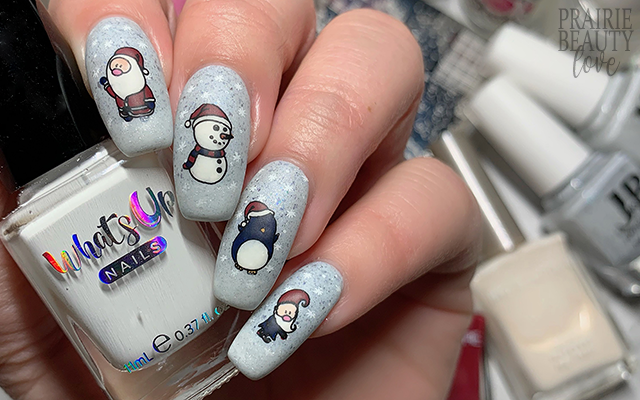
When I was sitting down to put together the color story for this mani, I knew I wanted to keep it really simple and cohesive across my nails. For the base, I decided to go with Jen & Berries Ice Stormed The Castle, which is this really soft barely blue polish filled with microflakes, tiny ultrachrome/chameleon flakes, and shimmers. It's absolutely perfect for winter and I knew it would make a gorgeous base for this mani. I did end up adding some Jen & Berries Snowfall In Sunnydale at the tip of the nail after applying my stamping to sort of act like snow, but it didn't quite behave the way I was hoping it would and sort of disappeared at the end of the day, but I still think it adds a little something.
To start this mani, I applied two coats of Ice Stormed The Castle to all of my nails as my base.

For the reverse stamping, I knew I wanted to carry the same color story across all of my nails, so I did most of the fill on the images using a berry red, a navy blue, and an ivory white. I did bring in a few other colors for smaller accents in the images, but I definitely kept the focus on those three colors to maintain cohesion. (Full disclosure, for this mani I did only do the four fingers because I was doing it for the blog, but if you want to recreate and you need something for your thumb, I would recommend one of the Christmas tree images.)
I decided that before I applied my decals, I wanted to add some snowfall stamping to the background just to give the whole nail a little bit of design. While my second coat of base polish was still a little tacky, I started by applying the snowfall images and then immediately after that I went in with my decals and placed it at the center of the nail. Next, I went in with Snowfall In Sunnydale, as mentioned above, and applied that straight from the bottle at the tip of my nail. (I would definitely recommend this, but probably go for a brighter, more opaque white if you want to get more impact.)
Finally, once I was happy with the design, I sealed everything in with a nail art top coat. Next, once that was dry, I applied a layer of glitter smoothing top coat and then finally finished with a matte top coat to bring down the shine and give a really smooth finish. And voila!
All Products Used
Jen & Berries - Ice Stormed The Castle
Jen & Berries - Snowfall In Sunnydale
BioSculpture - Berry Bush*
BioSculpture - Blue Mushroom*
BioSculpture - Seafoam*
BioSculpture - Island Clay*
BioSculpture - Golden Fall*
BioSculpture - Sakura Blossoms*
BioSculpture - Clay Pathway*
Whats Up Nails - Blanc My Mind*
Whats Up Nails - Neither Noir
Apipila Smudge Free Top Coat
Glisten & Glow Glitter Grabber
Anchor & Heart Sea Glass Matte Top Coat
Uberchic It's Beginning To Look A Lot Like Christmas Stamping Plate
Uberchic The Rocker Tall Rectangular Stamper
Whats Up Nails Magnified Clear Stamper & Scraper
Pueen Chunky Soft Transparent Stamper
NailStuff.ca Dotting Tool**
NailStuff.ca 4mm Nail Art Brush**
Pueen Latex Tape Liquid Peel Off Cuticle Guard*
* = PR Sample // ** = PR Sample/Affiliate NailStuff.ca code TRYSH

Can I just take a moment to tell you how much I love every single polish that I used for this mani? Like literally, they're all fantastic quality and perform beautifully. I really do think that Jen & Berries and BioSculpture specifically don't get nearly enough love on how gorgeous their polishes really are. Huge, huge props to them!
If you're interested in seeing a tutorial for this design - or any of the other holiday designs I've put together, head over to @pblnails on Instagram and follow me there to keep up on all of my nail art designs!
Thanks for reading!


0 comments