• Home
  • About
    • About Me
    • PR Friendly
    • Contact
  • Categories
    • Favorites
    • Drugstore
    • Naturals
    • Subscriptions
    • Hauls
    • Non-Beauty
  • Beauty
    • Skin Care
    • Hair Care
    • Body Care
    • Foundation
    • Concealer
    • Blush
    • Bronzer
    • Highlighter
    • Eyeshadow
    • Eyeliner
    • Mascara
  • Giveaways
Instagram Twitter Facebook Bloglovin Pinterest

Prairie Beauty


There is definitely something to be said for keeping it very, very simple with your Halloween nails and just applying a full cover spiderweb image, don't you think? Simple, effective, and you can pretty much create any vibe you want based on what you do with the base polish/design. For this mani, I combined smoky shades of blue with my favorite full cover spiderweb image to create this simple design with a surprising amount of visual interest.

Keep reading for more!
Share
Tweet
Pin
Share
No comments

THIS POST IS IN PARTNERSHIP WITH PUEEN COSMETICS.   

Recently, I ordered myself a set of Pueen stamping polishes, many of which I didn't already have in my collection, and I was super excited to use a few of them in this mani. If you're unfamiliar with Pueen stamping polishes, the quality on them is INCREDIBLY good and I continue to be impressed every time I try a new shade. And honestly, what better way to try out some new stamping polishes than to create a paint splatter mani? 

Keep reading for more!
Share
Tweet
Pin
Share
No comments


One of my personal Must Do holiday mani's has always been a nordic star sweater design. I'm not even sure how many years in a row I've done this style of design, but it has definitely been several. In my humble opinion, a nordic star design is peak Christmas sweater - and very often not even ugly. For this mani, I pulled out one of my all time favorite nail polishes, which I am now using as sparingly as possible as I'm pretty sure it has been discontinued, and paired it with a couple of different nordic star images to create a new version of this design. And, of course, I'm in love!

Keep reading for more!
Share
Tweet
Pin
Share
No comments


Did I desperately want to do one of those adorably gnome designs that you see from professional nail tech's last year? Absolutely I did. Did I try and fail miserably at hand painting them? 100%. So this year, when I saw the Clear Jelly Stamper CjS-LC-100 Stamping Plate, which also featured some really gorgeous plaid stamping images, I just had to have it. HAD TO HAVE IT. Initially, I had planned on doing this mani in red, but in the end I decided to go with blue and let the gnome shine. 

Keep reading for more!
Share
Tweet
Pin
Share
No comments


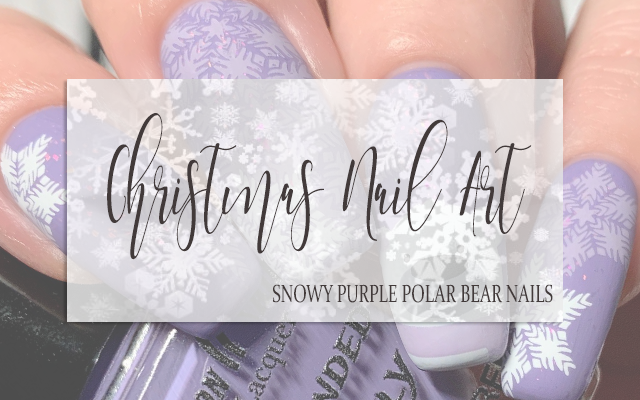
Every year at Christmas, I try to put together some mani's that aren't in traditional holiday colors - red, green, white, gold, blue, silver, that is - but I'm beginning to find myself thinking that shades of lavender are also becoming a little bit festive in my head. I wouldn't say that this mani is particularly festive, but I do think it's a really fun wintery holiday mani and I'm kind of in love with it. It also utilized layered stamping, which I've always been super intimidated by, and I'm kind of wildly in love with how that aspect of the design turned out. 

Keep reading for more!
Share
Tweet
Pin
Share
No comments


Earlier this year, I did a mani featuring an orange gradient tip and even at the time I knew that I would be bringing back the look for a Halloween mani. I changed up a few things - obviously! - but there is definitely no denying where the inspiration came from. I really love designs that are sheer over the nail bed and then have an opaque gradient tip. Whether worn as is or paired with some stamping, I feel like it's super versatile and pretty much always looks great. 

Keep reading for more!
Share
Tweet
Pin
Share
No comments


I haven't actually used many Clear Jelly Stamper plates up to this point, but if the experience of putting together today's mani is any indication I definitely think that I should be trying more. From the moment I saw this plate, I wanted to put together this mani and pretty much this mani exactly. I just loved the idea of the really spooky and creepy zombie silhouettes coming out of the darkness like something straight out of a horror movie. And with these layering images, it actually came together really quickly and easily. 

Keep reading for more!
Share
Tweet
Pin
Share
No comments


Today's mani takes a significant amount of inspiration from a mani from @hannys_manis from last Halloween season and I just fell so completely in love with the design that I had to do my own spin on it for this year's Halloween season. I have to admit, I've done a lot less reverse stamping this year thamn I did last year because I have a tendency to convince myself it's going to take forever and be exhausting or something, but it really does almost always come together really smoothly. 

Without further ado, let's get into the nails!
Share
Tweet
Pin
Share
No comments


IT IS TIME. I swear, when I sat down to do nails this weekend, my brain finally switched into spring mode and I'm all in. Bring on the pastels and the florals and all of the springiest spring things. I feel like I'm way too excited for this - especially since it literally snowed here yesterday. ANYWAY, I decided to try something for this week's mani that I'd actually considered several times before but never actually tried out and I'm sort of in love with how it turned out. 

Keep reading for more!
Share
Tweet
Pin
Share
No comments


Happy  Monday, all! Our March theme for #CBBxManiMonday is Spring/Green and because I'm neck deep in a random hyperfocus around doing a sort of rainbow gradient through my feed (my brain, I'm telling you...) I decided to stick with something springy in a blue color palette for this week and I'll transition into the green of it all next week. I don't think I've ever done a gradient skittle before using all one color, but I've really wanted to and with the stamping design I had in mind for this one it seemed like they time. 

Keep reading for more!
Share
Tweet
Pin
Share
No comments


My stamping plate collection has continued to grow and grow over the years and it's gotten to the point now where I definitely have some plates in my collection that I haven't gotten around to trying out yet and I really want to put in an effort to finally pull them out and use them this year. One of those plates is KADS Fashion 094, which is admittedly sort of a weird plate that I knew I wanted in my collection but I wasn't entirely sure how I was going to use. I finally pulled it out for this mani and I really couldn't be more thrilled about this first design that I created using it.

Keep reading for more!
Share
Tweet
Pin
Share
No comments


MERRY CHRISTMAS, EVERYONE! For my last holiday themed nail art design, I decided to go all in with a festive Christmas-y color palette and some really pretty ornament stamping with a bit of sparkle. I'm so thrilled with how this marathon of holiday and winter themed nail art has gone and I'm really happy to end it here with this mani. For those of you who have been here with me every step of the way, thank you so much and I hope you have or have had a wonderful holiday season, whatever you celebrate or don't. 

Without further ado, let's get to these nails!
Share
Tweet
Pin
Share
No comments


For pretty much as long as I've been doing Christmas nail art, I've wanted to put together a Grinch mani. Every year there's a short list of Christmas movies that I always make sure to curl up and watch and the Jim Carrey version of The Grinch Who Stole Christmas is definitely on that list, so I have a soft spot for the Grinchiness of it all. This year I thought ahead and ordered myself a Dr. Seuss themed stamping plate so that I would have what I needed to put together this design and I decided to keep it really simple with bold, bright colors and straightforward stamping. As a resident of the kitchen sink squad, I will go ahead and applaud my own restraint on this one. 

Keep reading for more!
Share
Tweet
Pin
Share
No comments


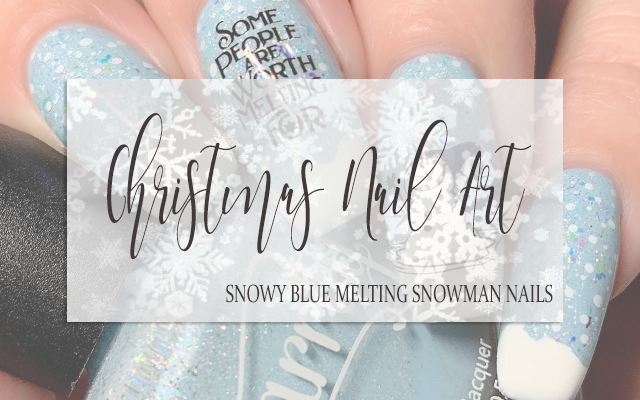
One of my favorite nail art designs from back in 2018 when I was still pretty new to nail art was this adorable little penguin design that I did and I've sort of had it in the back of my head to recreate something similar ever since. Now, four years to the day later, I decided that it was time, except instead of a penguin I was going to go with a snowman and I was going to level up the design a little bit with some other details that speak to experience. Honestly, I feel really proud when I look at how far I've come in the past 4 years when it comes to skill and creativity, and I love revisiting those old designs through these new eyes.

Keep reading for more!
Share
Tweet
Pin
Share
No comments


When I sit down to think of inspiration for these types of themed nail art marathons that I do for Halloween and Christmas every year, I definitely look through a lot of different sources to try and spark creativity. One of those sources is my own previous work, where I feel like I can find new ways to use old ideas, if that makes sense at all outside of my head. For today's mani, I took inspiration from this mani I posted a couple of months ago and I did a pretty direct recreation of it, changing up the color scheme and some other details to bring in the holiday vibe and make it it's own thing. 

Keep reading for more!
Share
Tweet
Pin
Share
No comments


So for today's Halloween mani, I did something a little bit different than what I normally do in an attempt to try to recreate a mani that was clearly done with gel polish - often a bit of a hit and miss endeavor, I must admit - but I think it turned out pretty cool. I'm a huge fan of @ashxmcgrath's work and I think her Halloween designs are some of her best, but I really wasn't sure how doing my own take on this gorgeous mani using traditional polish was going to go or if it would even work. Luckily, I think my take on it turned out pretty cool!

Keep reading for more!
Share
Tweet
Pin
Share
No comments


One of the things I did while I was putting together ideas for this year's Halloween nail art was to go back and look at designs I'd done previously. I didn't want to do a straight up recreation of any of them, but I did like the idea of doing some twists on some of my favorites. One of my absolute favorites from last year was my Spooky Grunge Voodoo Doll mani that I did and I definitely felt like I could easily take the spirit of that one and do something a little darker and more gritty with it this year. In the end... I feel pretty confident that I was able to do just that. 

Keep reading for more!
Share
Tweet
Pin
Share
No comments


I have to admit... today's mani will inevitably be one of the most intense as far as work put in and, quite frankly, struggle that I'll have through this entire month long marathon of Halloween nails. I definitely had some issues with the stamping plate and also the amount of reverse stamping I did for this mani was... a lot. But I'm pretty happy with the overall result so all of the struggle and work was probably worth it. Maybe. I do love how it turned out in the end. 

Keep reading for more!
Share
Tweet
Pin
Share
No comments


I have to be honest... trying to plan 31 brand spankin' Halloween themed mani's every year isn't just daunting, it feels pretty much impossible. So, to fill out this year's Halloween Nail Art designs, I've definitely always planned on going back and re-imagining some of the mani's I've put together in previous years. One of the mani's that I wanted to go back and re-imagine this year was my Shifty Glow Ouija Board Nails from last year, but I did want to bump it up a little bit so I took a bit of inspiration from this mani from @ashxmcgrath. I think the intersection of those two inspirations made a very, very me mani and I'm pretty happy with it!

Keep reading for more!
Share
Tweet
Pin
Share
No comments


Happy Spooky Season - officially! I've managed to avoid posting any Halloween designs until today because I wanted to do what has now become a truly overwhelming tradition - posting Halloween nail art designs every day in October right up until the 31st. For this first one, I wanted to start with a mani design that has become a yearly staple for me. I change up the colors every year, but this is the fifth year in a row and I still just absolutely love this design so I had to include it. It's actually sort of interesting to look back at how my nail art has evolved sort of through the lens of this mani. It's super simple and works for any nail length or shape. 

Keep reading for more!
Share
Tweet
Pin
Share
No comments
Older Posts

About Me

Trysh. Winnipeg, Manitoba, CANADA. Beauty Enthusiast. Loving Dog Mom. Avid reader. Proud Feminist. Really, really loves turtles.


EMAIL: contact@prairiebeautylove.ca

DISCOUNT CODES

DISCLAIMER: Affiliate codes are clearly marked as such.

Follow Prairie Beauty Love

  • Instagram
  • Twitter
  • Facebook
  • Pinterest
  • Google+
  • Bloglovin'

Facebook

Prairie Beauty Love

Twitter

Tweets by @beautyloveca
Powered by Blogger.
Facebook Twitter Instagram Pinterest Bloglovin
FOLLOW ME @INSTAGRAM

Created with by ThemeXpose | Distributed By Gooyaabi Templates