
NAIL ART: Modern Abstract White Quartz Smoosh Mani
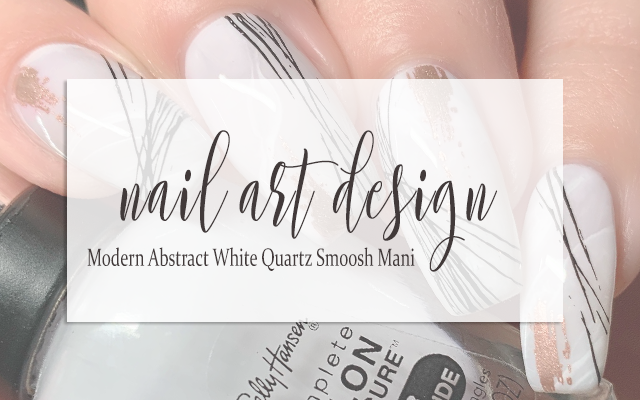
You may recall, if you saw my Amethyst Inspired Smooth Marble Mani recently, that I felt inspired to try this technique using different polishes for more of a white quartz inspired look. Admittedly, I'm having a bit of a moment with pretty rocks these days and I'm having a lot of fun playing with different ideas for how to get the look of natural stone onto my nails. For today's mani, I neutralized the color palette to almost white and added some modern abstract stamping for a little bit of interest and punch, and I am completely and totally obsessed with the final result.
Keep reading for more!
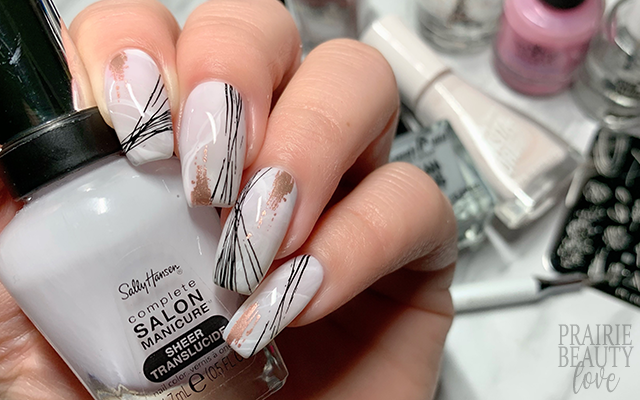
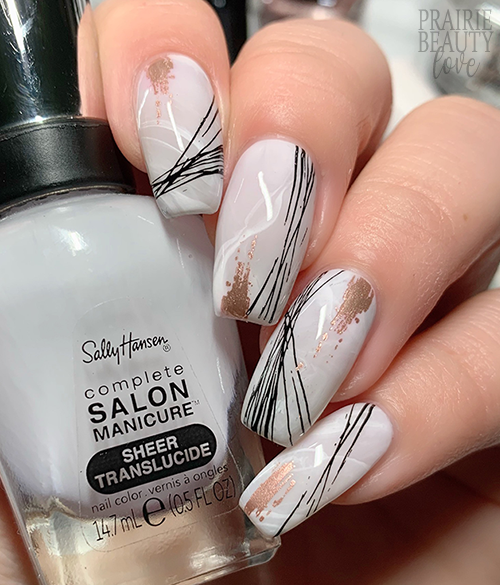
So when I was choosing the polishes to create this smoosh, I knew I wanted it to pull white but also that it had to be more of an almost white overall look so that I could get the dimension that I was looking for. For my sheer base polish, I went with a sheer polish that has a hint of a lavender tint to it - giving a little bit of neutralizing blue along with just the barest bit of rosiness . It's such a subtle tint that it does exactly what I was hoping it would and was actually pretty perfect for this mani.
The technique that I do to create this marbled look is pretty simple, but also a little bit hit and miss so I generally have to try a few times to get the look I want. I apply a layer of my sheer base polish to my nail art mat to start. I try to do a fairly thick layer at this stage because it helps to create a nice marble. For the marbling I did very small dots of polish in crisp white, pale grey, and the absolute palest possible pink, and then used a dotting tool to drag through the polish to create the marbling effect. Next, I do one press of my stamper into the polish and then lift it. This is generally the point where I'll know if I want to use the image or try again.
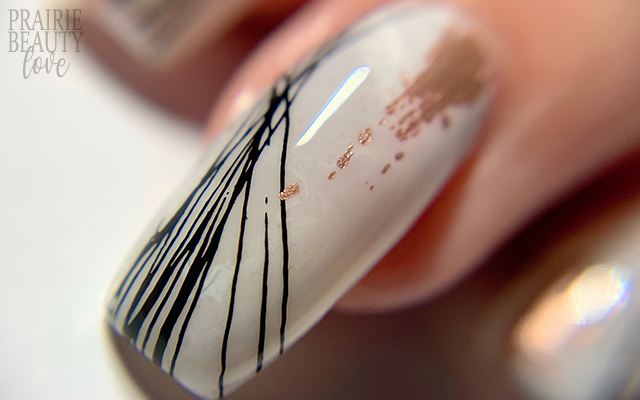
For this particular technique, I let the smoosh dry down on the stamper before transferring so that I don't lose the veined marble effect. You don't have to let it dry down entirely, but it's best to get it so that you can brush a fingertip over it without smudging or lifting it. I always apply a thin coat of my sheer polish to my nails and once it's most of the way dry I apply my cuticle barrier and transfer. This is, admittedly, a bit of a learning process and a lot of it will be finding the right feel. Once I cleaned up my edges and removed the cuticle barrier, I then applied another coat of my sheer polish to really give that depth to the overall look.
For this mani, I went in with some spider-gel-look stamping in black along with some brush stroke look stamping in rose gold. I feel like this color combo works really well to create a pretty, modern look on the nails. For the placement of the stamping, decided to just sort of wing it. I used four different images total - two spider gel images and two brush stroke images - to create this mani and I just alternated and played with placement so that each nail had a different look.
Once I was happy with my stamping, I sealed everything in with a nail art top coat and then finished with a generous layer of glossy top coat for a polished look. And voila!
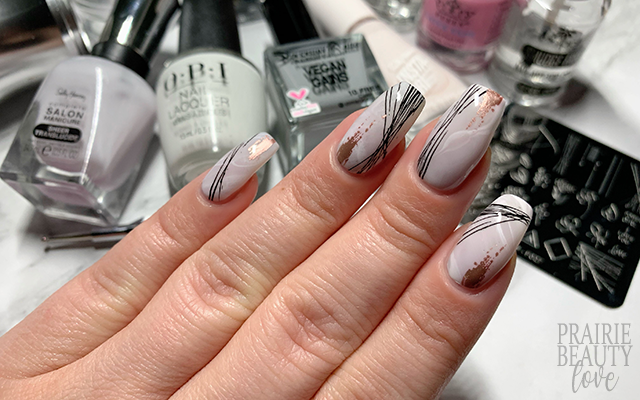
All Products Used
Sally Hansen - Give Me A Tint
Sally Hansen - Pink Pursuit
OPI - Alpine Snow
Dimension Nails - Vegan Gains
Whats Up Nails - Neither Noir
Whats Up Nails - Roses Are Gold
Apipila Smudge Free Top Coat
Sweet & Sour Lacquer Gloss Sauce Top Coat
Pueen Latex Tape Liquid Peel Off Cuticle Guard
Pict You PY-F027 Stamping Plate
NailStuff.ca Clear Stamper**
Whats Up Nails Magnified Clear Stamper
NailStuff.ca Dotting Tool**
** = PR Gifted from NailStuff.ca - use affiliate code TRYSH for 10% off your first order.
I have to admit, I'm so, so obsessed with how this one turned out - better than I could have hoped for - and I'm already thinking of other stones I could try to get the look of. My mind is telling me smoky quartz, lapis lazuli, and maybe some sort of flourite. Not sure, but some nebulous ideas are definitely wiggling around in my head.
If you want to see video of how I actually did this design, head over to @pblnails on Instagram and follow me there for all of my short form video tutorials!
Thanks for reading!


0 comments