
NAIL ART: Valentine's Day Berry Smoosh Mani

If you've been following my nail art for any period of time, you'll know that one of my favorite techniques is a smoosh and it's one that I always come back to. It's just so, so versatile and I feel like I can not only do a smoosh for every mood and occasion, but there's also different versions of the smoosh for different looks. For Valentine's Day themed nails this year, I knew I wanted to pull out a smoosh because there's just something about it that I love for this particular occasion.
Keep reading for more!
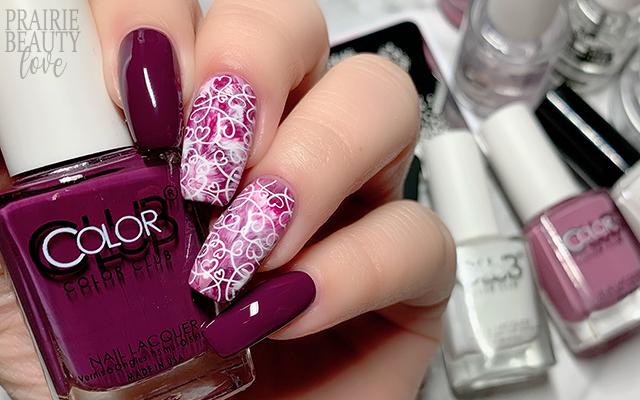
Last year for Valentine's Day, I did this pink and red smoosh with negative space stamping and I knew I didn't want to so anything too similar this year, so I kept that in mind as I was choosing my colors and stamping. For the smoosh, I wanted the pinks to lean more berry/purple than a warmer, redder pink so I grabbed for really rich polishes in plum, fuscia and a sort of pinky mauve. I also grabbed for a white to really bring some contrast and visual interest to the overall look. For the stamping, I decided to go with this sort of squiggly heart image from the Whats Up Nails B024 Love Is Everywhere Stamping Plate because I felt like it would stand up enough over the smoosh while still being sort of delicate.
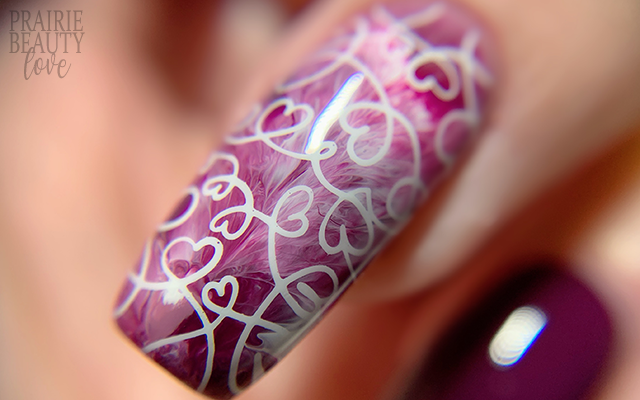
I started by applying my base polishes. I used one coat of the lightest pink shade for the nails that I was going to smoosh as well as two coats of the plum shade to the rest of my nails. To do the smoosh, I applied a handful of random dots of each polish to the head of a stamper and then pounce the stamper onto the nail a few times until I got the desired amount of smooshy blend. I did this one a little bit differently than I usually do this style, rolling my stamper slightly on the last smoosh to get that subtle sort of sunburst effect on the nails. At this point, I used a clean up brush to remove some of that extra polish from the smoosh. I ALWAYS apply a latex cuticle barrier when I do a smoosh to aid in clean up, so at this point I just got the excess out of the cuticles and left the barrier on my skin.
I gave the smoosh a few minutes to dry down before I went in with my stamping, which in this case was really quick and easy. Finally, once I was happy with the design, I cleaned up a little bit more, sealed the design in with a nail art top coat and then finished all of my nails with a generous layer of QDTC. And voila!
All Products Used
Color Club - French Tip
Color Club - Can You Dig It?
Color Club - Twice Bitten
Heroine NYC - Lovesick
Whats Up Nails - Blanc My Mind
Apipila Smudge Free Top Coat
Cuticula Limitless Quick Dry Top Coat
Whats Up Nails B024 Love Is Everywhere Stamping Plate
Whats Up Nails Magnified Stamper & Scraper
I swear, pretty much every single time I do a smoosh mani, I find myself wondering why I don't do them more often.... though I think that's probably because I forget that I actually do do them pretty often. Anyway, I actually wasn't sure about this one immediately after I did it, but the longer I looked at it the more in love with it I fell. I think that's one of my favorite things about nail art. Not only is it a trust the process kind of a thing, but there's also an aspect of letting it grow on you.
Anyway! Be sure to head over to @pblnails on Instagram to check out the video tutorial for this mani and be sure to follow me there to keep up on all of my nail designs!
Thanks for reading!


0 comments