
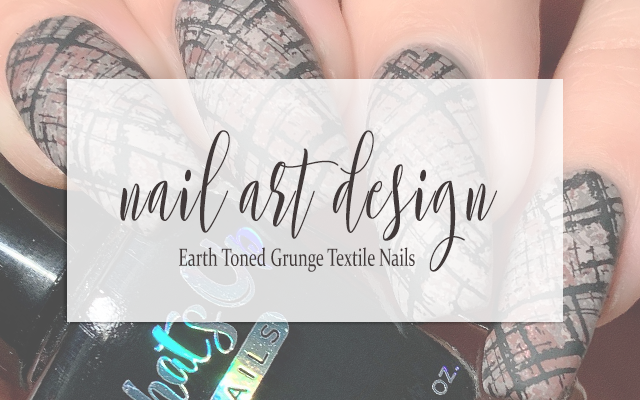
NAIL ART: Earth Toned Grunge Textile Nails
So when I decided I was going to revisit some of my favorite stamping images, I almost passed over the one that I used as sort of the main one in this mani because I continue to be just so happy with the mani I did with it the first time - which you can check out here, if you're interested - but I really wanted to challenge myself to use it again and do something completely different. It actually took some staring at it for a while, playing around with different colour combination ideas, and then finally I decided to actually pair it with another grungey image from the same plate and do some layered stamping to get some real depth of texture to the overall design. In my opinion, that's a really good way to use the same image over again but in a completely different way for a distinctly different overall look.
Keep reading for more!
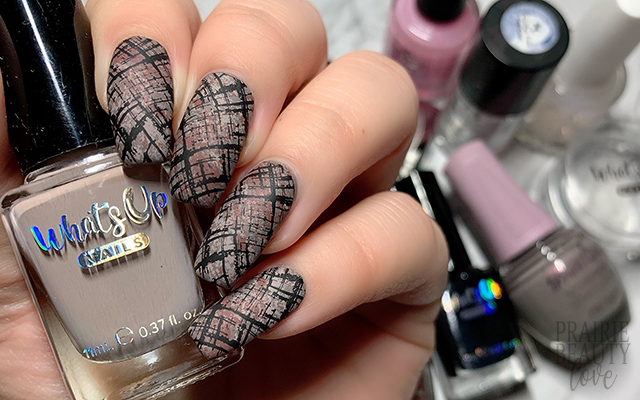
I knew going into this mani that I was going to want to mattify it because whenever I do designs that end up giving me the kind of textile vibes that this one does, I always like a matte finish - though I do admit that on this one I probably could have gone either way. Normally for a matte look, I would use either all créme finishes or I would grab something with an iridescent flake in it to give that sort of vibe, but rarely would I ever think to grab for a shimmer. However, as I was hunting around for the right base polish for this design in my head, I caught sight of SpaRitual's Present, which I picked up a while ago now and hadn't gotten around to using, and it occurred to me that it could be perfect for this mani.
Present is a warm grey that's packed with a fairly fine but really boldly bright pink shimmer. The reason that I thought it could really work for this mani is that the tone of the grey was absolutely perfect for what I was going for, but then that added shimmer would both add texture but also lean into the sort of warmer brown shade that I was going to use for one of the layers of stamping. Ultimately, I think it did exactly what I was hoping - though it's fairly subtle so in the photos it really only shows up in the macro below.
For this mani, I applied two coats of Present to all of my nails and let them dry down completely before moving on to my stamping.
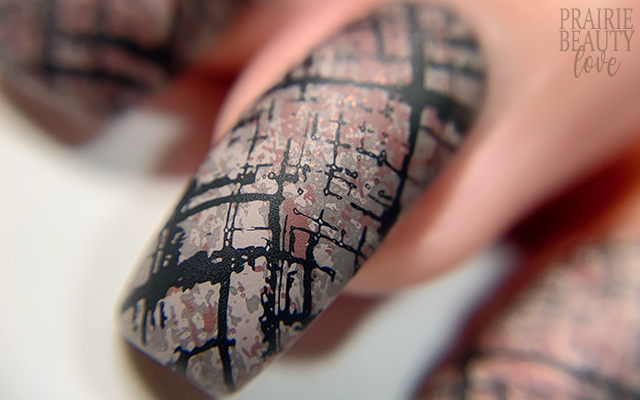
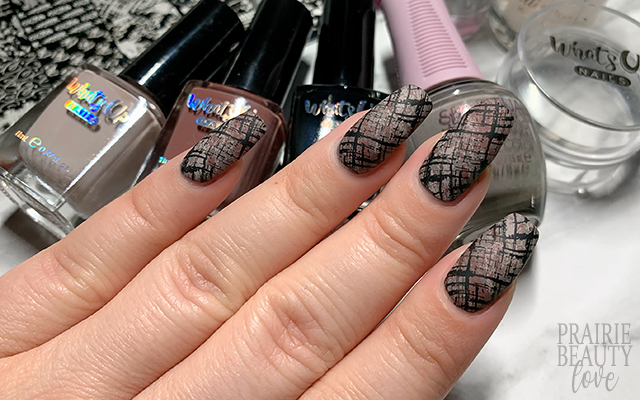
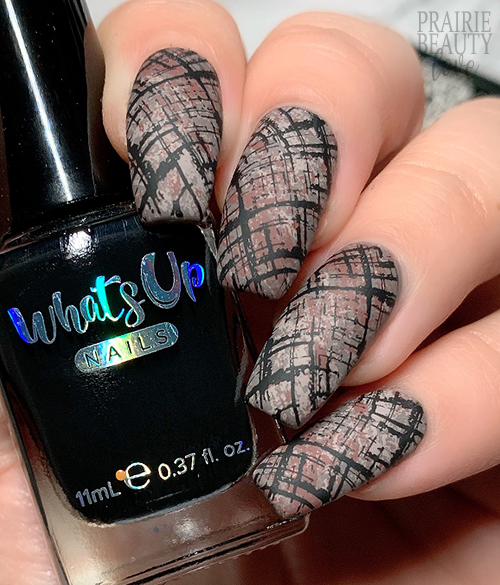
What really inspired me to do this layered stamping technique was actually this sort of grungey splatter image that I layered in the background of the design. Because it's a little bit more concentrated at one end of the design and then more sparse at the other, I felt like it would work really well applied in one direction in one colour and then the opposite direction in another, so that's what I did. I started with the lighter taupe shade, alternating the direction of my placement across my nails and then I went in with the sort of milk chocolate shade and applied in the opposite direction. This was definitely one of those times when it ended up working out exactly the way I hoped. Next, I went in with the grungey crosshatch image that was the jumping off point for this mani. I decided I wanted to use a black stamping polish for this image to add some distinct contrast and weight to the design. Like usual, I alternated the direction of my placement in order to get a little bit more interest and to break up the mani a little.
Once I was happy with my stamping, I sealed everything in with a nail art top coat and then followed with a matte top coat to take down the shine. And voila!
All Products Used
SpaRitual - Present
Whats Up Nails - Buff Is The Stuff
Whats Up Nails - You Mocha Me Happy
Whats Up Nails - Neither Noir
Maniology Smudge Free Top Coat
Cuticula Cloud Cover Matte Top Coat
Nicole Diary L16 Stamping Plate
Whats Up Nails Magnified Clear Stamper & Scraper
Pueen Latex Tape Liquid Peel Off Cuticle Guard
Something that has become very clear to me in the past year or so is that as much as I love stamping, I'm a background kind of a girl. I don't tend to love the designs I do that are just base polish and simple stamping, but instead I like to build out more intricate designs. What I love about this is that it has the ease of your basic polish + simple stamping designs, but it has the intricacy and look of something much more complicated to create. I love that!
If you want to check out a video tutorial for this mani, head over to @pblnails on Instagram and follow me there to keep up on all of my nail art.
Thanks for reading!


0 comments