
HALLOWEEN NAIL ART: Pastel Rainbow Gradient Spiderwebs Nails
THIS POST IS IN PARTNERSHIP WITH PUEEN COSMETICS.

As soon as I started jotting down ideas for Halloween nail art, I knew that I wanted to bust the pastels back out and do something playful and light overall. Cue my favorite way of putting together a rainbow gradient that really brings the unicorn vibes - using only 3 stamping polishes! Honestly, I'm sort of obsessed with these rainbow gradients and have been reaching for these three polishes often to create various different versions of it, so it only seemed fitting to bust them out for Halloween as well. Afterall, Halloween isn't all ghouls and blood, right?
Keep reading for more!

As you can see, there is just something about the spectrum and dimension that happens when you blend these three polishes in a gradient. It really does give the impression that I used 6 polishes because they just blend so smoothly and create such a perfect spectrum. (Why, yes, I am just over here become obsessed anew with this gradient....)
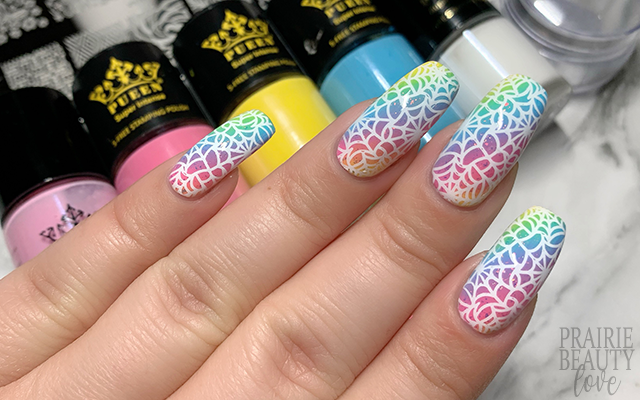
This gradient is also incredibly easy to do. I start by applying a nearly white base polish to all of my nails (I hate white bases, so I tend to pick a very, very pale pastel blue as my base for this type of thing) and let that dry down. Next, I apply my three polishes in a diagonal on a makeup sponge. For this one, I actually did thicker lines of pink and blue down the center of the sponge and then added stripes of yellow at the corners so that I would get a more complete color spectrum. Next, I just sponge sponge sponge. Because these polishes are so pigmented and blend so smoothly, it only takes me two passes to get my desired blend and opacity.

On a whim, before moving onto my stamping, I decided to add an iridescent flakie topper to all of my nails just to further smooth out that blend and to add a little bit of glitz. Iridescent flakie toppers are my personal favorite because they sort of behave like whatever you put them on - on pale colors like this one they give a subtle sort of sparkle while on deeper colors they pack a lot more punch.
Now, for the stamping I kept it super simple. I just used this fantastic full cover spiderweb image from the Pueen Nail Party 03 Stamping Plate* and a white stamping polish for all of my nails. As I like to do, I alternated the direction of the placement of the stamping in order to get some added visual interest and keep the nails from all looking exactly the same, but in a very subtle way.
Once I was happy with my stamping, I sealed it in with a nail art top coat and then followed with a glossy top coat for shine and volume. And voila!
All Products Used
Pueen - 808 Sweet Pink*
Pueen - 802 Baby Blue*
Pueen - 804 Bright Yellow*
Pueen - 806 Pure White*
Color Club - Astro-Naughty
Sally Hansen - Crystal Top Coat
Apipila Smudge Free Top Coat
Sweet & Sour Lacquer Gloss Sauce Top Coat
Pueen Nail Party 03 Stamping Plate*
Pueen Chunky Transparent Soft Stamper
Pueen Latex Tape Liquid Peel Off Cuticle Guard*
* = PR Sample.
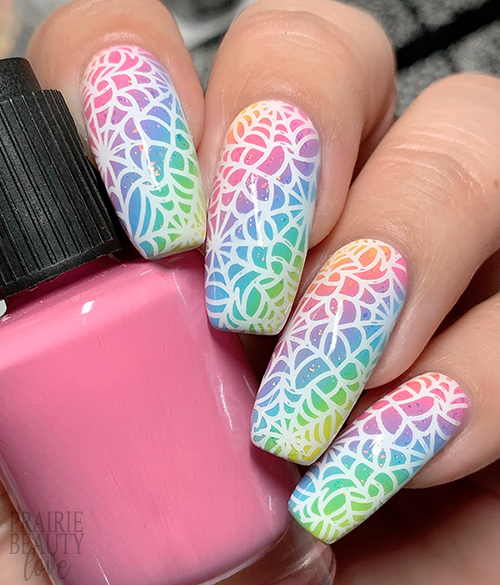
While pastels aren't necessarily the first thing you think of when it comes to Halloween nails, I actually personally think they're great for bringing to life some fun, playful Halloween looks, and I think this rainbow did a really beautiful job of that. It's Halloween... for unicorn princesses!
If you're interested in any of the Pueen products I used to put together this mani, they're all available from Amazon and I recommend all of them - but especially the stamping polishes, which have really, really impressed me over the past few months that I've been working with them consistently.
Thanks for reading! Be sure to follow me over at @pblnails on Instagram for video tutorials for all of my work and check back every day in October for more Halloween themed nail art designs!


0 comments