
NAIL ART: Made With Love Valentine's Gradient Nails

When I sat down to do today's nails, I pretty much knew exactly what I wanted to do with my stamping, but I wasn't entirely sure what to do for the base. I will admit that this is a problem pretty often and I think it can really make or break a design overall. In the end, I decided to go with what I tend to think of as a sort of signature mani for me with a sheer flakie pond base and holo gradient tip. For me, this really is one of the most versatile bases in my arsenal and is also deceptively easy to do - which I LOVE about it.
So without further ado, let's get to the nails!
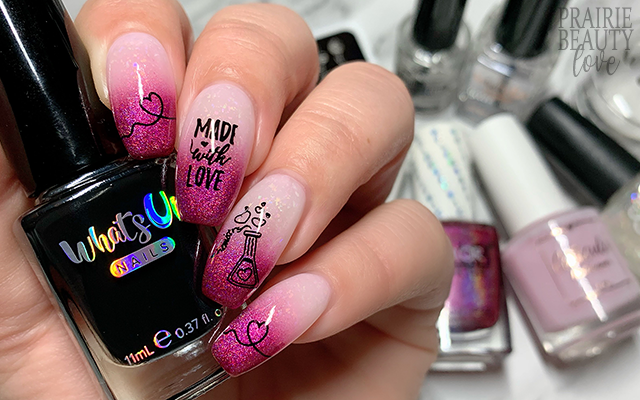
I tend to change up how I do the sheer base for this style of design, but I pretty much always do some version of a sheer nude or white polish paired with a flakie topper and for this design I went with two of my favorites. Cuticula's Neutralizer Base Coat is this really soft, sheer pink that I think was intended to be more of a camouflaging product than an actual nail color, but I absolutely love it for soft, pink leaning sheer looks and that's definitely how I tend to use it. For the flakie topper, I went with my absolute favorite, Starrily's Unicorn, which is an iridescent rainbow of flakies and is seriously absolutely stunning.
For this mani, I kept it really simple by sandwiching one coat of Unicorn between two coats of the Neutralizer Base. I do actually think you could just leave it at that for a really pretty nude base or even just a full mani on its own, but of course I always like to add nail art.
For the gradient tip, I decided to go all in with the boldest pink holo polish in my collection. That's Rich from Color Club is a full on magenta linear holo polish that packs a ton of punch. To do the gradient tip, I use a technique that ulitizes a clear polish sponged on alongside the holo to help get a smoother blend. For this mani, it took two passes of sponging to get the opacity and blend that I was looking for.
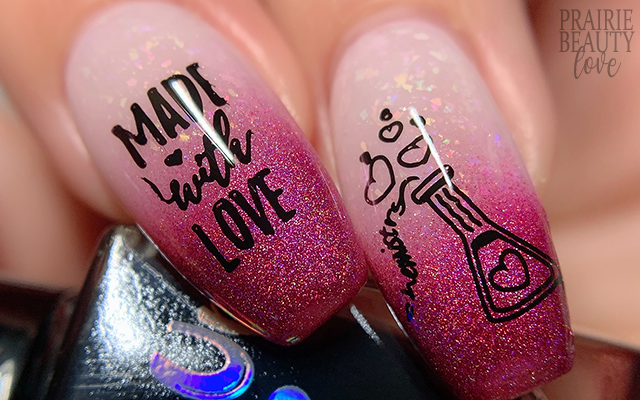
I decided to keep the stamping fairly simple on this one, but I really wanted to have a sort of... love chemistry kind of vibe to the design, if that makes sense, so I went with images that I felt represented that from the Whats Up Nails A023 When In Love Stamping Plate*. On my outer nails I applied this simple swoopy heart image towards the tip, keeping that pretty simple. For my ring finger, I went in with what I think of as the star image of this design with this bubbling beaker. And finally for my middle finger, I added the text image to bring it all together.
Once I was happy with my stamping, I sealed everything in with a nail art top coat and then followed with a layer of glossy top coat for shine and volume. And voila!

All Products Used
Cuticula - Neutralizer Base Coat
Starrily - Unicorn
Color Club - That's Rich
Color Club - Club Clear
Whats Up Nails - Neither Noir
Apipila Smudge Free Top Coat
Whats Up Nails Glossed Over Top Coat*
Whats Up Nails A023 When In Love Stamping Plate*
Whats Up Nails Magnified Clear Stamper & Scraper*
Pueen Latex Tape Liquid Peel Off Cuticle Guard*
* = PR Sample

Sometimes I forget just how much I really love this base style. I pretty much always add stamping to this type of design, but I really do think it would also be stunning just on its own. It's also perfect for really themed type of nail designs because the color choices can really give a unique and specific overall vibe. Love!
Be sure to head over to Cosmetic Proof and See The World In PINK today for more #CBBxManiMonday nail art! And, as always, check out the video tutorial for this design over at @pblnails on Instagram!
Thanks for reading!


0 comments