
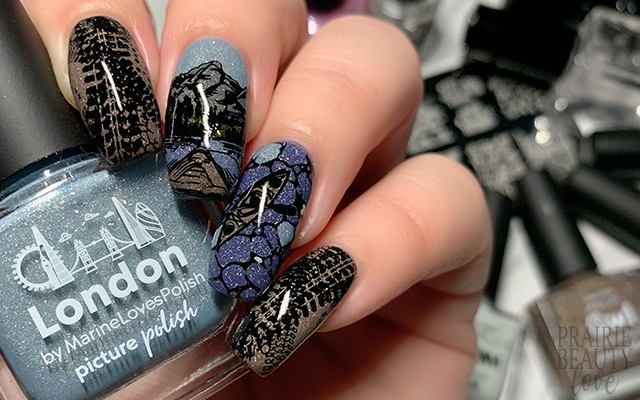
NAIL ART: Into The Wilderness Camping Nails

I have to admit, I used to pretty much use every stamping plate I acquired pretty much as soon as I got it, but as my collection has grown I've ended up not always reaching for them right away. There's definitely something about finally getting to pull that plastic film off of a plate and get to using it. The Whats Up Nails B070 Campfire Stories Stamping Plate has been in my collection for quite a while now, but I hadn't gotten around to using it yet. It was time, though, and it fit perfect with my current vibe of wanting to lean into nature inspired nail art for August.
Keep reading for more!
When I was deciding on the color story for this mani, I knew that I wanted to bring in some texture, so I started by grabbing a handful of polishes featuring holo flakes that I knew would work beautifully. I personally prefer polishes with holo flakes through them to any other form of holo because it provides a really nice look of texture without actually adding physical texture.
To start, I applied two coats of the appropriate base polish to each of my nails and let those dry while I worked on my decals. In this case, brown on my thumb, pointer and pinkie, the lighter blue on my middle finger and the darker blue on my ring finger.
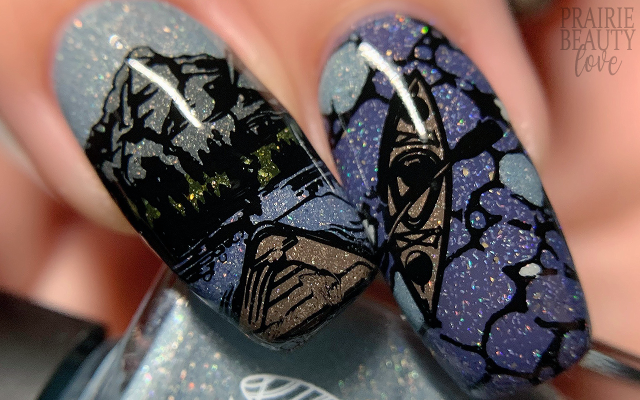
I think my favorite thing about these stamping images is that they have really thick, crisp lines to them, which made them really easy to fill. I used a 4mm nail art brush and to fill in each section of the two decals for the middle fingers and then let those dry down until they were still dry to the touch but flexible.
For my outer fingers, I applied the tire track marks stamping image using black polish, alternating the direction to get a different look on each nail. For the middle two fingers, I started by applying a thin layer of sticky base coat and letting that dry down until it was tacky before transferring the image. I used a metal cuticle tool and a clean up brush dipped in acetone to remove the excess and crisp up the edges.
Once I was happy with my design, I sealed it in with a layer of nail art top coat and then finished with a generous layer of glossy top coat for shine and volume. And voila!

All Products Used
Picture Polish - London
Picture Polish - Lakodom
Picture Polish - Owl
Picture Polish - Mossy
Picture Polish - Winter
ILNP - Better Days
Whats Up Nails - Neither Noir*
Apipila Smudge Free Top Coat
Whats Up Nails Gloss Over Top Coat*
Whats Up Nails B070 Campfire Stories Stamping Plate
Whats Up Nails Magnified Clear Stamper & Scraper*
NailStuff.ca 4mm Nail Art Brush**
* = PR Sample / ** = PR Sample/Affiliate

I'm so, so glad that I finally got around to pulling out this plate because I'm so happy with how this mani turned out. I swear, Whats Up Nails stamping plates absolutely never disappoint me.
Be sure to head over to Cosmetic Proof and See The World In PINK today for more summer themed nails for this week's #CBBxManiMonday! And check out the tutorial for this mani over on my Instagram @pblnails - follow to keep up on all my nail art!
Thanks for reading!


0 comments