
#HalloweenNails202312 Nails Of HalloweenessieHalloweenHalloween NailsHit The Bottlenail artnailsPict YouWhats Up Nails
HALLOWEEN NAIL ART: Smoky Vintage Happy Halloween Nails

WELL. Happy Halloween, everyone! Honestly, this month has gone both incredibly fast and also felt like a bit of a marathon. My brain and my nails both desperately need a break at this point, but I'm so thrilled with how this year's raft of Halloween nails went. I didn't do quite as many as last year since I took Sunday's off this year, but 26 Halloween themed nail designs is still a LOT. So this final one is a bit of a recreation, but I love this version of it and it feels sort of right to bookend my Halloween mani's with some recreations.
Keep reading for mor!
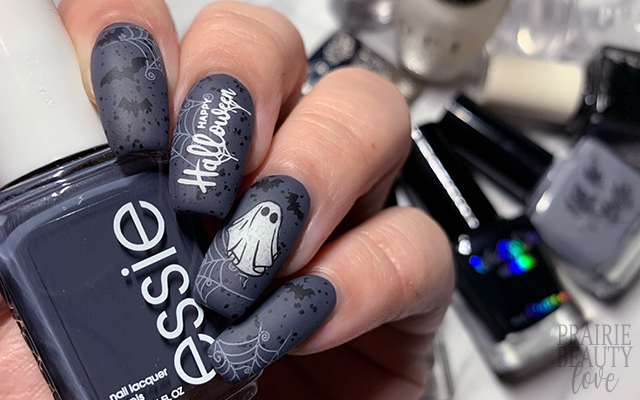
I really wanted to go in a completely different direction colorwise when it came to this mani, but there's really only so much you can do when all of the design elements sort of require black and white to make sense. In the end, I decided to go the directly opposite of the burnt orange shade I used for this design last year and go with a rich very blue toned charcoal grey polish as my base. Essie's Carol's & Caviar is ABSOLUTELY STUNNING and perfect for this design because it really brings spooky without being too dark.
To start, I applied one coat - ONE COAT!! - of Carols & Caviar. I followed that with one coat of Cirque Colors' Spotted, which is a perfect black speckled topper that I think just really elevates this design.

There are basically three components to the stamping on this design. In the background of each nail, there is this sort of swirly spiderweb, which I decided to apply in a mid-toned grey stamping polish. Next, there are the bats, which I applied in black stamping polish on all but my middle finger. On the middle finger I have the words "Happy Halloween" stamped in white. And finally, the best part - in my opinion, anyway - is the sort of vintage sheet ghost. For this one, I picked it up in black and filled it with Cirque's Hatch, which is a white speckled polish. I transferred the ghost decal to my nail using a sticky base coat.
Once I was happy with the design, I sealed it in with a nail art top coat (which bubbled absolutely brutally) and then finished with a matte top coat to bring down the shine. And voila!

All Products Used
Essie - Carols & Caviar
Cirque - Spotted
Cirque - Hatch
Whats Up Nails - Neither Noir
Hit The Bottle - Looking For Mr. Grey
Maniology Smudge Free Top Coat
OPI Matte Top Coat
Orly Bonder Base Coat
Pict You PY-X015 Stamping Plate
Whats Up Nails Magnified Clear Stamper & Scraper*
Pueen Latex Tape Liquid Peel Off Cuticle Guard*
* = PR Sample

And there you have it - another year of Halloween nail art complete! I need a nap!
If you want to see all of the mani's I did for this spooky season, you can find them all HERE! Also, if you're interested in video tutorials for this and every mani that I post here on the blog, be sure to head over to my Instagram @pblnails and follow me there to keep up on all of my nail art.
Thanks for reading!


0 comments