
#HalloweenNails2022#NailArt12 Nails Of HalloweenBIO SCULPTUREColor ClubHalloweenHalloween NailsMoYou Londonnail artnails
HALLOWEEN NAIL ART: Bold Neon Spectrum Gradient Bat Nails

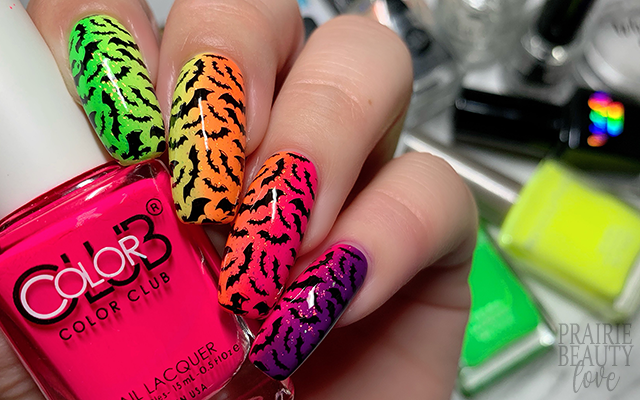
I must admit, today's mani is one of those designs that I do some version of every year. I just can't resist doing a full coverage bat mani over a really pretty gradient base. I do change it up when it comes the colors and finishes that I use, but I must say that there's something about a neon gradient with a bold black bat design. Maybe it's the Lisa Frank nostaglia of it all, I dunno. Whatever it is, I think that a full spectrum neon rainbow gradient bat mani is a classic for Halloween nails and is one not to be missed.
Keep reading for more!
Since I did do a version very, very similar to this one two years ago, I decided to change up my color placement a little bit in order to make it different. Also, I have green and yellow neon nail polishes that actually work beautifully in a gradient now (that was not the case until this year!) so it seemed like it would be wasteful to stick them on my thumb where they wouldn't show up in the pictures. I went through my collection of neons and picked some of my favorites - 4 from Color Club and 2 from BioSculpture (those are the aforementioned green and yellow...) - to create a full spectrum gradient.
I started by applying a nearly white créme polish to all of my nails as my base and I let that dry down completely. You really don't need that layer to be opaque, just sort of bright and definitely dry. I also applied a latex cuticle barrier to make the clean up a little easier.

For this mani, I did do three passes of sponging on each nail to get the opacity and blend that I was looking for, but it actually goes pretty quickly with all of these polishes. I start at one end of my hand and go across and by the time I'm ready to go back to the beginning generally the polishes will be dry enough for my next layer. Once I was happy with my gradient, I went in and applied a subtle flakie topper just to smooth everything down and further blend that transition between colors.
For the bat stamping, I went in with black stamping polish and this full coverage bat image. This plate has definitely been giving me issues and this pickup was definitely not ideal. Up close you can really see that there were a lot of gaps in the pickup, but it actually looked pretty good in person and I don't think anyone would notice the gaps in the stamping.
Once I was happy with the design, I removed the latex barrier and cleaned up as best I could with a cleanup brush dipped in acetone before sealing everything in with nail art top coat. Finally, I finished with a generous layer of quick dry glossy top coat for shine and voila!

All Products Used
Color Club - Astro-Naughty
Color Club - Disco Dress
Color Club - Warhol
Color Club - Catch A Fire
Color Club - Chelsea Girl
BioSculpture - Sunshine Sway*
BioSculpture - Limelight*
Sally Hansen Miracle Gel - Crystal Top Coat
Whats Up Nails - Neither Noir
Apipila Smudge Free Top Coat
Vibrant Vinyls Fast & Hard Top Coat
MoYou London Universal Monsters 02 Stamping Plate
Whats Up Nails Magnified Clear Stamper & Scraper
Pueen Latex Tape Liquid Peel Off Cuticle Guard
* = PR Sample.

Honestly, I would happy do pretty much this exact mani every single year (though I would use a different stamping plate, if we're being honest) and I think it will be equally exciting every single time. I just can't get enough of a vertical rainbow gradient, especially in these really bold and exciting neon colors. Seriously I think every nail artist needs a rainbow of neon polishes for occasions such as these.
If you're not already following me over at @pblnails on Instagram, be sure to head over there to keep up to date on all of my nail art and to see video tutorials of every mani I post here on the blog!
Thanks for reading!


0 comments