
NAIL ART: Green & White Graphic Geometric Nails
THIS POST IS IN PARTNERSHIP WITH PUEEN COSMETICS.

I'm having a bit of a moment right now with figuring out how to create dynamic designs using one single full cover stamping image and it's actually a really fun exercise. Honestly, with today's mani I wasn't entirely sure that I was going to be able to make it work, but I actually really, really love the final product and it has me inspired to try out this technique with different vibes and themes.
Keep reading for more!

Colorwise I kept this mani really, really simple, which is not really something I can usually say. When I sat down to do this one, my December PPU had basically just arrived and I really wanted to get Painted Polish's Lookin' Mighty Pine onto my nails, so I went with that as my base polish for this mani. This polish contains a mix of gold and silver reflective glitters, pink galaxy holographic glitters, and micro holographic flakies in a deep emerald green base and on the nails it has this deep vampiness with the most gorgeous twinkle.
For this mani, I started by applying two coats of Lookin' Mighty Pine. This polish does dry down with some texture from those reflective glitters and at this point I could have easily gone in with a glitter smoothing top coat, but I left it as it was and I do think I ended up with some subtle texture under my stamping but I didn't find it too big a deal.
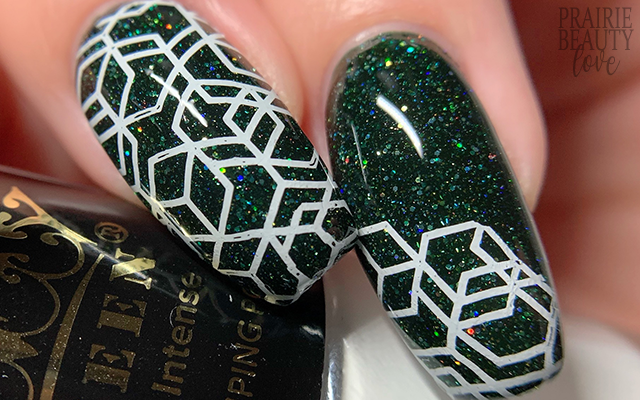
For the stamping, I went with this really graphic geometric image from the Pueen 108 Stamping Plate (which is available in one of their large sets of round stamping plates, the one that comes with the yellow case) and it definitely felt like a challenge to isolate only parts of the image for two of my nails. For my thumb, middle and pinkie fingers I went in with the full image and just applied it as normal. To isolate only a part of the image, I actually did two steps after I picked up the image on my stamper. First, I went in with a dotting tool and gently broke the lines of stamping polish where I wanted to breakup the image and the I went in with my lint roller and removed the portion of image that I didn't need. You definitely have to work quickly when you do this or the stamping polish will dry on the stamper and won't transfer properly (or at all) to the nail. If you want a little more time I would recommend applying a sticky base coat over your base polish and letting it get tacky so that your stamping has something to stick to.
Once I was happy with my stamping, I sealed everything in with a nail art top coat and then followed with a very generous layer of glossy top coat for shine and volume. And voila!

All Products Used
Pueen Cosmetics - 806 Pure White*
Pueen Cosmetics 108 Stamping Plate*
Pueen Cosmetics Chunky Soft Transparent Stamper*
Pueen Cosmetics Latex Tape Liquid Peel Off Cuticle Guard*
Painted Polish - Lookin' Mighty Pine
Apipila Smudge Free Top Coat
Sweet & Sour Lacquer Gloss Sauce Top Coat
* = Post contains PR Samples from and is sponsored by Pueen Cosmetics

As experiments with nail art go - and trust me, it's a WIDE spectrum of results when I'm playing around and experimenting - I'm going to call this one a success. I love how it all came together in the end and I think the use of the partial images really worked well to create a cohesive design overall.
If you're interested in any of the Pueen products I used to create this mani, they're all available from Amazon and they all get my stamp of approval.
Thanks for reading!


0 comments