
#ChristmasNails2022#NailArt12 Nails Of ChristmaschristmasChristmas Nail ArtColor ClubCuticulanail artnailsUberchic BeautyWhats Up Nails
CHRISTMAS NAIL ART: Cozy Purple Coffee & Christmas Cheer Nails

Every holiday season when I'm putting together my Christmas nail art designs, I always like to deviate a little from the traditional color palette we tend to associate with this time of year, and I always find that you can pretty easily make purple work for something wintery. I actually had some version of this mani in my head for weeks before I sat down to it... and then I promptly failed on what I initially had in mind and had to recalibrate, but I'm so glad that I did because I love how this one turned out!
Keep reading for more!
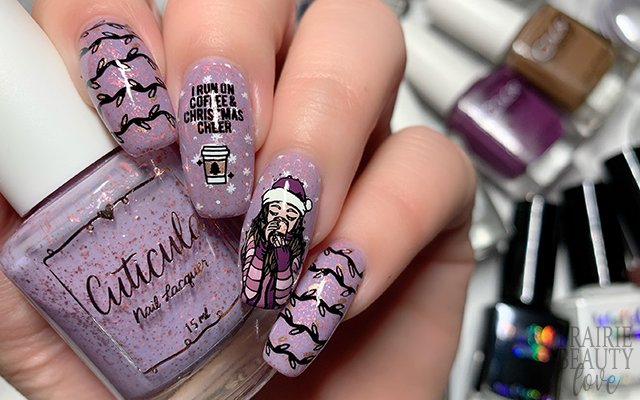
So really, the whole color story for this mani was entirely built on the base polish. Cuticula's Unwind is a gorgeous lilac purple base just absolutely packed full of really beautiful metallic rose gold flakes and I'm honestly sort of in love with it, especially in the winter for some reason. To go along with the base polish, I brought in shades of purple and pink that were similar in undertone and felt like a good fit along with some rose gold that is a little less pink than the flakes in the base but still, I think, works very well with the overall design.
To start, I went in with two coats of Unwind on all of my nails and let those dry down while I worked on my reverse stamping.

I decided for this mani that I really wanted to bring in some text - I've really, really been loving text in my designs this year - and some layered stamping to go along with this absolutely perfect image of a girl sipping a hot drink dressed all cozy for the season. To start, I picked up the image of the girl and used a dotting tool and a teeny tiny nail art brush to gill it in with various shades of purple along with brown hair and a skin tone color that is very similar to my own.
Now, for the stamping on my outer nails, I did this layered string lights pairing with... mixed results. I found the rose gold polish a little hard to see, so my application isn't quite as perfect as I might like. For my middle two fingers, I started by applying this falling snow image in white to bring a little bit of extra texture to that background. On my ring finger I applied my reverse stamped decal and on my middle finger I started by applying the text near the base and then the layered coffee cup image towards the tip.
Once I was happy with the design, I sealed everything in with a nail art top coat. Once that was dry, I went in with a glitter smoothing top coat on my ring finger just to make sure that there weren't any lumps from the decal. And finally, I finished all of my nails with a generous layer of quick dry glossy top coat for shine and volume. And voila!
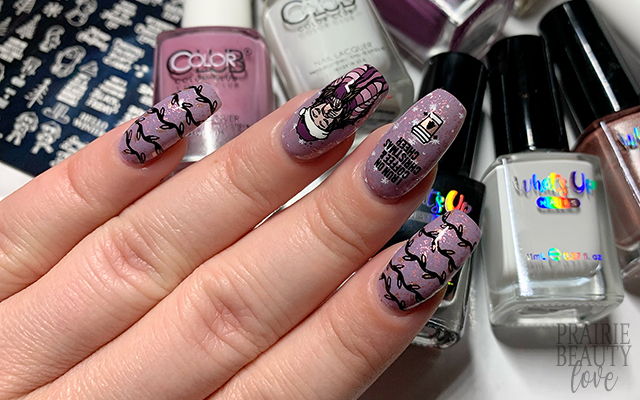
All Products Used
Cuticula - Unwind
Color Club - French Tip
Color Club - New-Tral
Color Club - Can You Dig It?
Color Club - Talk Dirty To Me
Color Club - Take It All Off
Whats Up Nails - Neither Noir
Whats Up Nails - Blanc My Mind*
Whats Up Nails - Roses Are Gold
Apipila Smudge Free Top Coat
Glisten & Glow Glitter Grabber
Sweet & Sour Lacquer Gloss Sauce Top Coat
Whats Up Nails B049 Hot Chocolate Season Stamping Plate
Uberchic Beauty It's Beginning To Look A Lot Like Christmas Stamping Plate
Whats Up Nails Magnified Clear Stamper & Scraper
Pueen Chunky Soft Transparent Stamper
NailStuff.ca Dotting Tool**
NailStuff.ca 4mm Nail Art Brush**
Pueen Latex Tape Liquid Peel Off Cuticle Guard*
* = PR Sample // ** PR Sample/Affiliate NailStuff.ca code TRYSH

I'm seriously so smitten with this design and so happy with the changes from my original plan because I feel like the overall design is just better, but also it suits my personal style of nail art much better than the original. I'm also getting more comfortable at reaching for multiple stamping plates for one design, which is something I've tended to avoid doing in the past.
If you're interested in seeing a tutorial for this design - or any of the other holiday designs I've put together, head over to @pblnails on Instagram and follow me there to keep up on all of my nail art designs!
Thanks for reading!


0 comments