• Home
  • About
    • About Me
    • PR Friendly
    • Contact
  • Categories
    • Favorites
    • Drugstore
    • Naturals
    • Subscriptions
    • Hauls
    • Non-Beauty
  • Beauty
    • Skin Care
    • Hair Care
    • Body Care
    • Foundation
    • Concealer
    • Blush
    • Bronzer
    • Highlighter
    • Eyeshadow
    • Eyeliner
    • Mascara
  • Giveaways
Instagram Twitter Facebook Bloglovin Pinterest

Prairie Beauty


I have to admit, it sort of feels like it's not Halloween if I haven't done some sort of haunted house or graveyard silhouette nails. Honestly, they've always been some of my favorite Halloween nail designs and I still get excited to put one together every year. 

Keep reading for more!
Share
Tweet
Pin
Share
No comments


I have a tendency to put off reverse stamping because I convince myself that it's very difficult and will stress me out. Because of this, this mani was one of the first that I conceived when I was planning this year's Halloween nails and is one of the later ones I actually put together on the nails. And, like always, it was much less stressful than I convinced myself it was going to be and the final product is SO worth it. 

Keep reading for more!
Share
Tweet
Pin
Share
No comments


Every year since I started doing Halloween nail art, I've done some version of bats stamped over a gradient. It's honestly one of my favorite designs and I feel like there's no limit to how many completely different versions of this design you can put together. This year, I decided that I wanted to do something a little different from previous years, so I put together a pastel rainbow gradient as my base and I'm obsessed!

Keep reading for more!
Share
Tweet
Pin
Share
No comments


I don't often do mani's where all of my nails are the same these days, but when I do, I make sure that I have an interesting base to go along with it - mostly! For this mani, I decided to do a style of gradient that I'm not sure I've ever attempted before and then paired it with some really crisp, simple Halloween stamping that I think manages to be impactful despite its simplicity. 

Keep reading for more!
Share
Tweet
Pin
Share
No comments


One of my personal Must Do holiday mani's has always been a nordic star sweater design. I'm not even sure how many years in a row I've done this style of design, but it has definitely been several. In my humble opinion, a nordic star design is peak Christmas sweater - and very often not even ugly. For this mani, I pulled out one of my all time favorite nail polishes, which I am now using as sparingly as possible as I'm pretty sure it has been discontinued, and paired it with a couple of different nordic star images to create a new version of this design. And, of course, I'm in love!

Keep reading for more!
Share
Tweet
Pin
Share
No comments


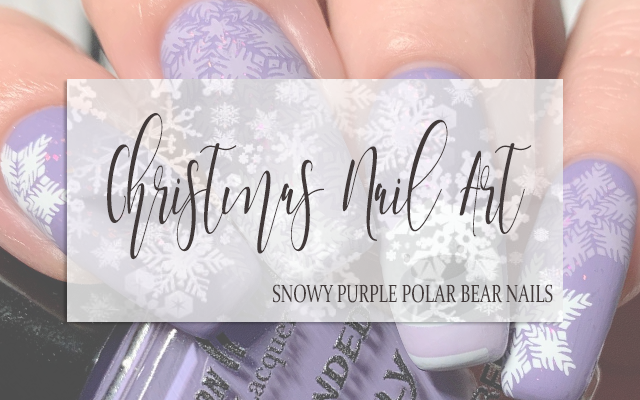
Every year at Christmas, I try to put together some mani's that aren't in traditional holiday colors - red, green, white, gold, blue, silver, that is - but I'm beginning to find myself thinking that shades of lavender are also becoming a little bit festive in my head. I wouldn't say that this mani is particularly festive, but I do think it's a really fun wintery holiday mani and I'm kind of in love with it. It also utilized layered stamping, which I've always been super intimidated by, and I'm kind of wildly in love with how that aspect of the design turned out. 

Keep reading for more!
Share
Tweet
Pin
Share
No comments


Today's mani is another recreation of one of my personal favorite designs that I did last year - but this time around I went with a much more traditionally Christmas color story and I think it might have turned out even better than the first time. Even though I tend to convince myself that reverse stamping is going to be complicated and take a lot time, it almost never does. That said, this mani also utilized some layered stamping, which I'm still getting the hang of if I'm being honest, and that really does make the whole process go a lot more smoothly.

Keep reading for more!
Share
Tweet
Pin
Share
No comments


Recently on a bit of a whim, I picked up a couple of magnetic polishes from the Chinese brand Xeijayi. As soon as I swatched them out, I knew that I wanted to put together some version of this mani. I really, really love the way that cat eye gel polishes look when you mattify them, it gives them a really unique velvety look, so that's definitely what I was going for with this particular mani. 

Keep reading for more!
Share
Tweet
Pin
Share
No comments


Being that it's the Monday before American Thanksgiving and I've already very much got Christmas nails on the brain, I decided today would be my last distinctly fall mani. And, of course, by fall I mean the pumpkin spice white girl version of fall. When I picked up the Uberchic Sweater Weather Stamping Plate, I knew I wanted to do some version of today's mani but I had actually intended on making it a little more intricate before deciding to keep it pretty simple. Simple, for me, can be pretty difficult to maintain, but I think I managed!

Keep reading for more!
Share
Tweet
Pin
Share
No comments


I have to say, when I sat down to do my nails last night for this post, I was lacking in both energy and inspiration until I remembered that I really wanted to use the layered mushrooms image from the Uberchic Sweater Weather stamping plate rather badly. Layered stamping images have always stressed me out a bit, but I've been playing with them a bit more lately and it really is amazing just how quickly they make a really complicated design come together. In the end, this particular mani came together really smoothly and I love the final result. 

Keep reading for more!
Share
Tweet
Pin
Share
No comments


After the marathon that was Halloween nail art, I took a bit of a break from doing my nails and now I'm back with a pretty minimal (for me) nail design to transition away from the spooky season theme to hang out in fall vibes until it's time to move on to Christmas. November really is always a strange time for nails for me. Our #CBBxManiMonday theme this month is... really no theme at all. We decided to go with a Free For All theme and that is very much going to work for me since I can't really wrap my brain around another theme right now. 

Without further rambling, let's get to the nails!
Share
Tweet
Pin
Share
No comments


As soon as I saw this year's Uberchic Halloween plate - 09, if you're wondering! - I wanted to put together some version of today's mani. I love that they included both a full cover image featuring the vampire teeth as well as the single image. I absolutely love when plates do that because it really allows for a cohesive design without having to try and isolate a single image from the full cover image or just fully cover all of your nails. For me, versatility with plates is really important, so this is huge for me.

Keep reading for more!
Share
Tweet
Pin
Share
No comments


I feel like I can't let a Halloween season go by without doing some sort of spooky haunted house or graveyard silhouette nails - they're just such a staple! That said, I do like to change it up at least a bit every time so I'm not just throwing the same mani's out there every year. For this year's silhouette mani, I decided to go with a neon vertical gradient base, which I think is something I've never done before. And I think it turned out genuinely stunning!

Keep reading for more!
Share
Tweet
Pin
Share
No comments


Because my collection of Halloween stamping plates is somewhat ridiculous at this point, I don't order nearly as many as I used to, but of the few that I picked up this year, one had been on my list for AGES and specifically because of the images I used to create this mani. I don't know what it was about these kind of silly skull images from the Uberchic Beauty Halloween 05 Stamping Plate, but I've wanted to create some version of this mani since the first time I saw it and I finally pulled the trigger and ordered it this year!

Keep reading for more!
Share
Tweet
Pin
Share
No comments


One of my favorite and most popular Halloween mani's that I've ever posted was a neon skittle featuring a combination of bats and spiderwebs. While I was tempted to do a straight up recreation simply using a different color palette, I decided instead to do a completely different mani that took inspiration from that one but definitely didn't recreate it. I often tend to lean into either bright or vampy colors for Halloween, but for this one I decided to go with some muted fall tones and I think it works pretty well!

Keep reading for more!
Share
Tweet
Pin
Share
No comments


I'm someone who generally doesn't like to use more than one stamping plate for a mani, but as soon as I saw the new Uberchic Halloween 09 plate, I knew that I wanted to pair this really delicate full cover spiderweb image with another delicate spiderweb image from the KADS Halloween 008 plate. I also decided to pair it with one of the new limited edition Scooby Doo polishes from Wet N Wild, which I absolutely had to pick up because I really, really love Scooby Doo to a degree that I think might surprise some people. Anyway, I put it all together and I'm really happy with how it came out. 

Keep reading for more!
Share
Tweet
Pin
Share
No comments


I really am having a resurgence of excitement for nail art now that we've transitioned into spring and I feel like I can delve into the designs and styles that I love for this time of year. I particularly, for some reason, love to do gradients in the springtime and I've been fully leaning into that for the past couple of weeks. There are a lot of different ways that you can sponge on gradients, of course, and I have to admit that I pretty much love them all, but this style of vertical rainbow gradient will always hold a special place for me and it seemed like a good time to dive into one.

Keep reading!
Share
Tweet
Pin
Share
No comments


MERRY CHRISTMAS, EVERYONE! For my last holiday themed nail art design, I decided to go all in with a festive Christmas-y color palette and some really pretty ornament stamping with a bit of sparkle. I'm so thrilled with how this marathon of holiday and winter themed nail art has gone and I'm really happy to end it here with this mani. For those of you who have been here with me every step of the way, thank you so much and I hope you have or have had a wonderful holiday season, whatever you celebrate or don't. 

Without further ado, let's get to these nails!
Share
Tweet
Pin
Share
No comments


One thing that I always find myself being mindful of when it comes to putting together Christmas/Holiday themed nail art is that I can't lean entirely on the color palette that we think of as traditionally seasonal. I mean, I love a red and green or icy blue mani as much as the next one, but I feel like great holiday nail art can also come in more non-traditional colors - especially if those colors have a distinctly cozy vibe to them. For today's mani, I leaned into taupe paired with black, white and champagne gold and I think it definitely brings the holiday vibe without being too on the nose. 

Keep reading for more!
Share
Tweet
Pin
Share
No comments


Some of my favorite nail art designs for the holidays are the ones that don't actually specifically reference any of the solstice adjacent holidays and instead lean all the way in to the winteriness of it all. For today's mani, I decided to take inspiration from a mani that I did a couple of years ago with this really frosty blue gradient and swirling snowflake stamping, but add a little something more for 2022 with some more stamping. I mean... by this point I have embraced my love for the kitchen sink, so no one will be surprised when I decide more is more. 

Keep reading for... more!
Share
Tweet
Pin
Share
No comments
Older Posts

About Me

Trysh. Winnipeg, Manitoba, CANADA. Beauty Enthusiast. Loving Dog Mom. Avid reader. Proud Feminist. Really, really loves turtles.


EMAIL: contact@prairiebeautylove.ca

DISCOUNT CODES

DISCLAIMER: Affiliate codes are clearly marked as such.

Follow Prairie Beauty Love

  • Instagram
  • Twitter
  • Facebook
  • Pinterest
  • Google+
  • Bloglovin'

Facebook

Prairie Beauty Love

Twitter

Tweets by @beautyloveca
Powered by Blogger.
Facebook Twitter Instagram Pinterest Bloglovin
FOLLOW ME @INSTAGRAM

Created with by ThemeXpose | Distributed By Gooyaabi Templates