NAIL ART: Pastel Neon Gradient French Skittle Mani
Sometimes when I've been doing a lot of nails that are really busy or deep in a theme or whatever, I just need a bit of a palette cleanse. Sometimes that means I just want to choose a nude or muted polish and not do any nail art, but other times I still want to do nail art... I just want to keep it fairly simple and soft. That's definitely where I was at when I sat down to do this mani. I actually had something much more involved planned but I just couldn't get into it and ultimately decided to do something really soft and light and a little bit delicate feeling - and I'm kind of obsessed with it.
Keep reading for more!
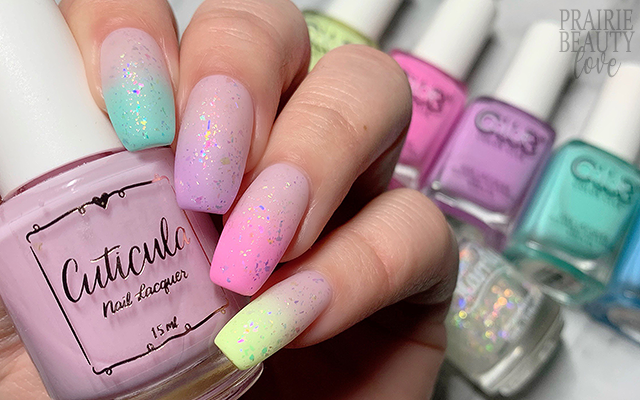
I've done a mani similar to this one in the past, so it really just came down to choosing the polishes that I wanted to use to get it done. I knew I wanted to keep it pastel - even though I'm currently watching a once-in-decades blizzard happening outside my window, I'm still feeling deep in spring at the moment - and I knew I wanted to have a little bit of coverage to the sheer base. For the base, I decided to go with the Cuticula Neutralizer Base Coat, which is a really cool toned barely-pink sheer, because it would maintain that sheer nude look but would also provide some camouflage to some imperfections in my nail bed.
For the tips, I decided to go with pastel neons from Color Club - shocking, I know - and I went for a milky yellow, a cool pink, a lavender, a turquoise, and a blue (on my thumb, not pictured).
Putting together this mani is actually really easy and quick. I started by applying one coat of the sheer nude to all of my nails as my base and let it dry down. Next, I applied a cuticle barrier to make for easier clean up and let that dry down as well. Now, to apply the gradient, I used a triangle makeup sponge and I applied the pastel neon at one end and then applied the sheer nude to the rest of the sponge, with a ratio of about 1/3 color, 2/3 sheer. I did three layers of sponging for this mani to get the opacity and blend that I was looking for. Once I had removed the cuticle barrier and removed any left over mess with a clean up brush dipped in acetone, I followed with a glossy top coat to smooth the texture and blend of the gradient.
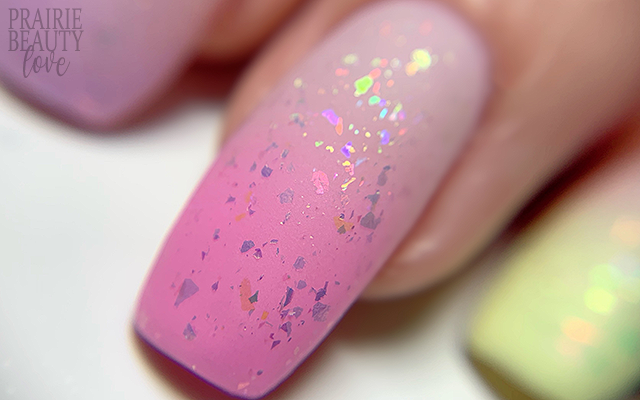
I did consider leaving it there, because that is a really pretty look, but in the end I decided that I also wanted to add a flakie topper, so I grabbed for Starrily's Unicorn and applied a generous coat of that to all of my nails. Finally, I finished with a matte top coat to take down the shine and give a different look to those rainbow flakies. And voila!
All Products Used
Cuticula Neutralizer Base Coat
Color Club - Like A Boss
Color Club - Wicker Park
Color Club - Can You Not?
Color Club - I'm Outta Here
Color Club - Take A Chill Pill
Starrily - Unicorn
Vibrant Vinyls Fast & Hard Top Coat
Quo Flash Dry Matte Top Coat
Pueen Latex Tape Liquid Peel Off Cuticle Guard
When I first decided to try a mani like this, a few years ago now, it was because I was in love with the way similar mani's done in acrylic looked and I wanted to find a way to get that look using regular nail polish. I think this mani really did get that done. Using that neutralizing base along with a matte finish really, I think, gives that similar look to a nude acrylic and the pastel neons blend really nicely with it for a smooth gradient look.
For a video tutorial on how I did this mani, head over to @pblnails and give a follow to keep up to date on all of my nail art designs!
Thanks for reading!


0 comments