
THIS POST IS IN PARTNERSHIP WITH PUEEN COSMETICS.

Happy November, all! Anyone else feeling a little bit fatigued from the Halloween season or is that just me? Honestly, I think November is the hardest month for me to find my creativity because I'm coming off the marathon of Halloween nails and I've already got my eye on Christmas nails, so it can be a bit of a struggle to come up with new and fun ideas without a really specific theme in my head. That said, I'm really excited about this first mani out of the Halloween season because it's something I've sort of loosely had in mind for a while now but hadn't gotten around to trying out.
Keep reading for more!
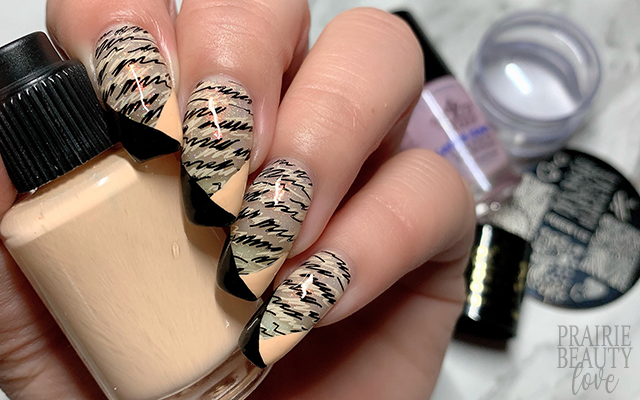
The color story for this particular mani was very, very much rooted in the fact that I needed a bit of a palette cleanse - hence the heaving leaning into nudes. I chose a sheer cream base packed full of warm leaning flakes as my base because I really wanted there to be a sort of lightness overall to this mani even though I did plan on bringing in the black. My initial plan was to just do all of the actual nail art in black, but ultimately I decided to pair it with a peachy toned cream color stamping polish to add a graphic element to the overall design and add some interest. Even though it was intended as a palette cleanse, I didn't want it to be too subtle.
To start, I applied two coats of my base polish to all of my nails and let those dry down.

This nail art design was definitely entirely inspired by this sort of scribbled stamping image from the Pueen 113 Stamping Plate. It's such a simple design of just rows of these sort of chicken scratch scribbles, but it actually makes it feel really ambiguous, in my opinion. Now, for this design I started by applying the stamping image in the cream shade and then I went in with the same image in black, changing the direction of my placement to break it up a little bit.
Next, for the tip, I went in with a liner brush and started by applying a line of the cream polish at a diagonal at the tip of my nail. Next, I filled in from the line to the tip of the nail using polish straight from the bottle - I find that doing it this way rather than continuing with a nail art brush both makes it faster and also gives a smoother final result. I then repeated the same action on the other side of the nail using the black polish to create a sort of point at the tip of the nail.
Once I was happy with my design, I went in with a nail art top coat to seal in the design and then followed with a generous layer of glossy top coat to take down the shine and pop those flakes in the base polish. And voila!

All Products Used
Pueen Cosmetics - 819 Ballerina*
Pueen Cosmetics - 805 Black Jack*
Pueen Cosmetics 113 Stamping Plate*
Pueen Cosmetics Chunky Soft Transparent Stamper*
Pueen Cosmetics Latex Tape Liquid Peel Off Cuticle Guard*
Girly Bits Cosmetics - Budget Smudget
Apipila Smudge Free Top Coat
Sweet & Sour Lacquer Gloss Sauce Top Coat
*This post is sponsored by Pueen Cosmetics and contains PR gifted products as well as products that I've purchased myself.

I feel like I sort of use the term "Modified French" to basically describe any nail art design that has focuses on graphic designs at the tip of the nail and this sort of angled French is my personal favorite, especially with stamping underneath it. It's actually a really versatile technique and surprisingly easy to accomplish on your own as long as you have a fine nail art liner brush and 1 or 2 really pigmented polishes. Highly recommend trying it out!
If you're interested in any of the Pueen Cosmetics products featured in this post, they are all available from Amazon. The stamping plate I used for this design is only available in a large set, but it's actually a really, really affordable set containing a wide variety of different stamping designs.
Thanks for reading!


0 comments